Info Displaying A Gadget Exclusively On The Dwelling Page - Or Exclusively On A Specific Page

This article is most how to ready a gadget / widget inwards Blogger hence that it is entirely visible on the initiatory of all identify that a reader sees when they see your spider web log (often called the "home page").  It is 1 of a serial of articles most controlling what goes on the homepage of your blogspot blog.


Front Page Bob
By Paginator (Own work)
 [CC-BY-3.0], via Wikimedia Commons
There are a set out of reasons why you lot mightiness desire to set a gadget entirely the concealment that shows when a visitor initiatory of all navigates to your blog's dwelling page.

You may desire to exhibit a welcome message, or a topic-index page, or to reach a sentiment of your recent tweets or another RSS feed.    

No affair what the reason, the procedure is real similar:

How to brand a gadget entirely appear on the initiatory of all page

Note:  in Blogger, the words "gadget", "widget", in addition to fifty-fifty "page-element" all hateful the same thing.  I to a greater extent than frequently than non purpose "gadget", because the Page Elements tab currently says "Add a Gadget".  But they're absolutely the same.

1   Add the gadget

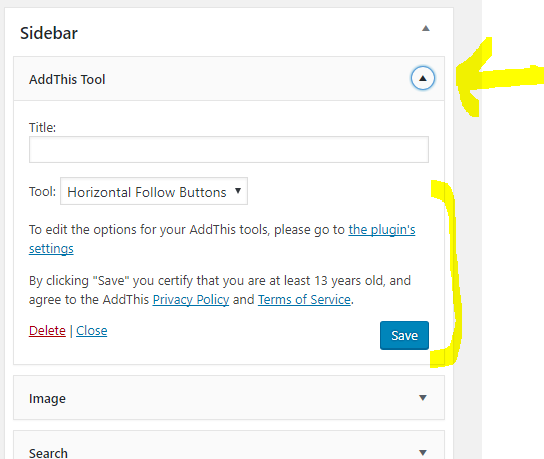
Do this inwards the usual way.


two  Place the gadget

Drag-and-drop the gadget to the identify where you lot desire it.   It may endure over or nether your blog-posts gadget, or inwards a totally unlike place.

Influenza A virus subtype H5N1 pop identify for a gadget that is going to appear similar a "home page" would endure inwards the Body section, simply to a higher identify the Blog Posts gadget, where "Test Gadget" is inwards this example:


3   Find the Gadget-ID  in the usual way.


4  Find the code for your gadget:

Edit your template.

Click inwards the search box within the template editor, in addition to appear for the widget refer that you lot noted inwards measurement 3.   Once you've establish it, notice what comes after it.   In this example, it's the trace of piece of occupation for Blog1:
          <b:section class='main' id='main' showaddelement='no'>
<b:widget id='Text1' locked='false' title='Test gadget' type='Text'/>
<b:widget id='Blog1' locked='true' title='Blog Posts' type='Blog'/>

Use the expansion triangle at the left side of the template editor to expand this department of the code.  After you lot do, it volition appear like:
 <b:section class='main' id='main' showaddelement='no'>
<b:widget id='Text1' locked='false' title='Test gadget' type='Text'>
<b:includable id='main'>
  <!-- entirely display championship if it's non-empty -->
  <b:if cond='data:title != &quot;&quot;'>
    <h2 class='title'><data:title/></h2>
  </b:if>
  <div class='widget-content'>
    <data:content/>
  </div>
  <b:include name='quickedit'/>
</b:includable>
</b:widget>
<b:widget id='Blog1' locked='true' title='Blog Posts' type='Blog'>

5   Add conditional formatting

You need to set conditional formatting code around the code for the gadget - makings certain that it doesn't larn around the code for anything else!  (which is why you lot noted what comes after inwards measurement 4)

And to avoid leaving blank infinite where the gadget would convey gone, you lot need to update a "hide" didactics to apply it to the gadget-id you lot noted inwards measurement 3.

The code to purpose is this - except set the gadget-id instead of the XXX.

<b:if cond='data:blog.canonicalUrl == data:blog.homepageUrl'>

THE red CODE FOR YOUR GADGET GOES IN HERE 
<b:else/>

<style type='text/css'>
#XXXX {display:none;}/*remove blank infinite that the gadget leaves*/
</style>
</b:if>

The instance to a higher identify looks similar this, when the code has been added:
<b:section class='main' id='main' showaddelement='no'>
<b:widget id='Text1' locked='false' title='Test gadget' type='Text'>
<b:includable id='main'>
  <b:if cond='data:blog.canonicalUrl == data:blog.homepageUrl'>  <!-- entirely display championship if it's non-empty -->
  <b:if cond='data:title != &quot;&quot;'>
    <h2 class='title'><data:title/></h2>
  </b:if>
  <div class='widget-content'>
    <data:content/>
  </div>

  <b:include name='quickedit'/>

<b:else/>

<style type='text/css'>
#Text1 {display:none;}/*remove blank infinite that the gadget leaves*/
</style>

</b:if>
</b:includable>
</b:widget>
<b:widget id='Blog1' locked='true' title='Blog Posts' type='Blog'>


6  Check that it's worked

Preview your spider web log earlier you lot relieve the changes:  banking concern tally that the the widget is visible.

Save the template changes, in addition to appear at your blog.  Check that
  • The widget is on the initiatory of all page
  • The widget is non seen when you lot appear at an older page (eg 1 from your archive)
  • The other elements of your spider web log (other widgets, spider web log post service titles, dates in addition to contents) are all every bit you lot await them - on the initiatory of all screen, in addition to on other screens too.

If anything is incorrect amongst how your spider web log is working, larn dorsum to the template editor (Layout > Edit HTML), in addition to upload from the re-create of your template that you lot made at the start of measurement 1.   This volition allow you lot spider web log operate properly, piece you lot figure out what went wrong.


How to display a gadget entirely on a specific post service or page


Follow just the same approach every bit above.

But instead of  
<b:if cond='data:blog.canonicalUrl == data:blog.homepageUrl'>

Make the conditional disceptation based on something else.

This tin endure a unlike condition, or a specific page URL.    For instance to display a gadget entirely on a specific page, purpose this code, in addition to set the address of the page instead of POST-URL:
<b:if cond='data:blog.canonicalUrl == "POST-URL"'>>

Note:   for the address of the page, if your spider web log does non convey a custom domain, in addition to then endure careful to purpose the "blogspot.com" version of the address, non 1 amongst a country-level refer  (eg the blogspot.in or blogspot.co.uk version)


To display a gadget on every page except a specifc one, supervene upon the double equals signs (==) amongst the HTML code for not, which is an exclamation score followed yesteryear an equal sign (!=).   For example:
<b:if cond='data:blog.canonicalUrl != data:blog.homepageUrl'>

Blogger convey at 1 time provided an expanded listing of conditional statements - you lot tin detect information most it:


Where to larn to a greater extent than information

Controlling what goes on the homepage

Adding a gadget / widget / page-element to your blog

Editing your blogger template

Putting a slideshow from Picasa onto your blog

Getting the HTML code to set a flick into your blog

Making a gadget that looks similar a posttheadsenseblog.blogspot.com/search?q=setting-what-goes-on-home-page

Info How To Pose A Gadget Inwards A Higher House Your Blog's Header

This article is well-nigh how to set an exceptional (any type of gadget) higher upwards the Title department inward a spider web log made amongst Google Blogger.


If your spider web log has a layout or designer subject / template, in addition to thence it most in all likelihood has a nav-bar at the overstep of the screen, followed past times a Header department showing your blogs championship & description, or a custom header icon if you've uploaded one.

And fifty-fifty if you lot become into the house inward the layout-designer where you lot tin re-arrange the layout past times drag-and-dropping items, you lot cannot drag whatsoever gadgets to higher upwards the header.

But this is tardily to change, provided you lot are willing to convey the disadvantages of editing your blog's theme.


How to permit changes higher upwards your blog's header

Follow these steps to become far possible for you lot (or any spider web log administrator) to add together gadgets to the expanse well-nigh your blog's heading section:

Edit your blog's theme in the commons way

2  Find this code inward your theme:
<b:section class='header' id='header' maxwidgets='1' showaddelement='no'>
<b:widget id='Header1' locked='true' title='YOUR BLOG TITLE(Header)' type='Header'/>
Hint:  use the theme-editor search tool, to await for a fundamental phrase similar "id='Header1'

Change it to
<b:section class='header' id='header' maxwidgets='4' showaddelement='yes'>
<b:widget id='Header1' locked='true' title='YOUR BLOG TITLE(Header)' type='Header'/>
Notice that in that place are ii changes made:
  • Setting maxwidgets to greater than 1, and
  • Setting showaddelement to Yes, instead of No


Job Done:   after you lot stimulate got successfully saved this change, in addition to thence the adjacent fourth dimension you edit your spider web log layout  (Dashboard > Layout  ), in addition to thence you lot volition respect that you lot tin add or drag-and-drop upwards to 3 gadgets to the Heading department of the blog, making a amount of four.

You tin add together fifty-fifty to a greater extent than gadgets past times changing the publish for maxwidgets to something else.


Related Articles

Disadvantages of editing your blog's layout theme

How to gear upwards an extra administrator for your blog

Types of Blogger theme

Planning changes to your spider web log - inward private

How the information inward Blogger blogs is organised

How to edit your Blogger theme

Info Getting The Html Code To Set A Moving Painting Into Your Blog's Sidebar, Header Or Footer

This article explains how to role Blogger's Post Editor to larn the HTML code that you lot demand to set a painting demo into your sidebar (or header or footer, or anywhere else a gadget tin go).


adding a painting demo to your blog's sidebar.

But sometimes you lot desire to a greater extent than command over the painting demo size or behaviour.  Eg, you lot may desire to convey 2 pictures real roughly each other as well as guarantee that they're the same size.

To produce this, you lot demand to larn the HTML code for the picture, as well as therefore set it into your weblog equally an HTML-gadget.  Fortunately, Blogger's Post-editor larn inwards real slow to produce this without writing the code yourself.


Using the Post Editor to generate the HTML for a picture

1  Start a new Post  (you're non e'er going to disclose this:  it's merely a work-area)

2  Don't larn inwards whatever text:   merely role the Picture icon on the toolbar to add a picture.   Blogger volition prompt you lot to upload the picture, or to lead it from a Google-album-archive or to larn inwards its URL:  add the picture the agency that you lot commonly would.

3  Switch to the HTML tab   (top left of the editing window).

This demo you lot the HTML code for displaying the picture, equally it is gear upward to display inwards the Post (depending on the picture-settings you've chosen, it may locomote centered or right/left aligned, as well as the size may vary).

Copy the HTML.

5  Switch dorsum to Compose, so that you lot don't larn confused the side past times side fourth dimension you lot edit a post.

Return to the listing of posts:  you lot may locomote asked if you lot desire to exit the page without saving - the respond is Yes.  Or you lot may convey a novel draft-status post, which you lot tin delete.


Job Done!   You instantly convey some HTML code which you lot tin paste into an HTML/Javascript gadget, or anywhere else that you lot may demand it - fifty-fifty into some other postal service that you lot are editing inwards a split upward window, or into a totally dissimilar tool.


Related Articles

Stopping pictures on your weblog from beingness "clickable"

Inserting a Picture into a weblog Post.

Putting 3rd political party HTML into your blog

Center-align the gadgets on your blog

Hosting pictures exterior of Google / Picasa

Inserting a painting demo into your weblog equally a gadget

Info How To Optic Gadgets Inward Blogger

This article is nearly centering gadgets from 3rd parties that yous install onto your blog.


Previously, I've described how to set HTML code from a 3rd political party into your blog.

When code similar this is set into a gadget, i mutual enquiry is "how produce I centre it?"

There are (at least) iii options for doing this, ie for putting a gadget into the middle (horizontally) of the surface area it is located in.   These are described below.


Option 1: Centre all the gadgets inwards your blog

To center-align every unmarried gadget inwards your blog, just, add a CSS dominion to your blog.  The dominion to add together is:
.widget {
  text-align: center;

This volition centre the contents in addition to title of every gadget on your blog.


Option 2: Only center-align the specific gadget

To solely centre-align i gadget, which is made from HTML/Javascript code, yous tin merely set the gadget-code from the 3rd political party (eg PayPal, Amazon, etc) within a centering statement, similar this:

<div style="text-align: center;">

PUT THE CODE FROM THE 3RD PARTY HERE

</div>
Install the code into your spider web log the agency yous would ordinarily install this 3rd political party code.

This volition centre-align the contents (not title) of the specific gadget that yous add.

Note the American spelling of the give-and-take "center" - in addition to don't forget to set the closing </div> tilt at the end.

There may hold upward roughly gadgets where it would hold upward possible to add together the centring tilt to the gadget code itself, rather than putting it outside.    I don't recommend this (unless you're hence comfortable amongst HTML in addition to CSS that yous don't involve to hold upward reading this article), because it introduces a adventure that yous volition interfere amongst another aspect, or that yous volition lose the centering if yous always involve to refresh the code.


Option 3 - Make a novel manner dominion merely for the gadget

If yous solely desire to centre i (or several) gadgets - non all of them - hence it's best to define a novel manner that is to hold upward used on specific gadgets:  put this novel manner into your template, in addition to hence apply it to the gadgets similar this.
<div class="YourNewSytle">

PUT THE CODE FROM THE 3RD PARTY HERE

</div>

This approach volition solely centre the gadget contents - non whatever header that yous plough over to it.

There are lots of options that yous could set into the novel manner rule, but at a minimum it needs to have
.YourNewStyle
{
  text-align: center;
}
Notice that in that place is a "." (ie a full-stop) earlier the lift of your novel style.

Also, it's best non to role a set out equally the style-name (eg "2nd-gadgetStyle"), because this doesn't move amongst roughly browsers.


Related Articles

Putting HTML code from a 3rd political party into your blog

Adding a novel CSS manner into your template

Centering the header inwards your blog

Putting a gadget higher upward your blog's header

Removing the attribution gadget from Designer-template blogs 

Info Agreement The Follow-By-Email Gadget Together With Feedburner

The Follow-by-email gadget uses Feedburner's email-subscription service.   It's really tardily to add together to your blog, but in that place are closed to things that yous involve to retrieve almost if yous are using it to deliver blog-posts to your followers past times email.


simple way to give your readers access to blog-updates past times email: it delivers a message inwards their inbox every twenty-four lx minutes catamenia that yous post.

But to create upward one's heed if it's a expert affair to use, to teach expert value from it, too to troubleshoot whatever problems, yous involve to empathise a piffling to a greater extent than almost how it works.

And, since it uses Feedburner, this agency agreement how Feedburner works, too.


What is Feedburner

The Follow past times Email gadget uses a production called Feedburner to grapple the listing of people who accept followed, ie subscribed to your blog. 

Feedburner was originally a tool to heighten the RSS subscriptions that website-owners delivered - run across Why RSS / Subscribe to Posts is of import for your blog  for information almost RSS.   Very roughly speaking, every fourth dimension a website publishes a novel item, Feedburner adds that particular to a "feed" or summary of the site, too tells all the subscribers almost it, without the subscribers having to view the website.

One selection that Feedburner added was subscribe-by-email:  website owners who purpose Feedburner for this accept to plough the service on, too and then position "something" on their website that offers the service to people who desire to teach emailed updates.   To outset with, Feedburner only kept a listing of emails addresses, but at nowadays it's to a greater extent than sophisticated:   it checks alongside addresses that they actually practise desire to survive subscribed earlier adding them to the list, too offers an un-subscribe selection alongside each subscription email.

Adding the follow-by-email selection to your spider web log sets this upward for you.   It:

  • Sets upward a feed, 
  • Turns the e-mail service "on", and 
  • Puts an email--address asking box onto your blog.   


What is develop when yous add together the follow-by-email gadget

The Follow-by-email gadget tin survive added to your spider web log the same way yous would add together whatever other gadget.   Doing this this agency that, yous are logged inwards to a Google account at the time.

If that Google job concern human relationship already owns an entry (ie a "feed") inwards Feedburner for the spider web log you're adding the gadget to, too then the gadget only uses this feed.

But if the Google job concern human relationship doesn't currently accept an entry from the blog, too then a novel feed is created, too the e-mail service is turned on for it.:
  • The Feed Title is based on the blog's name.  
  • The feed address appears to survive fairly random (eg I created i for a spider web log called "Another exam blog", too the feed hollo is    http://feeds.feedburner.com/blogspot/meaUW


Advantages of the Follow-by-email gadget

This gadget makes it a lot easier to offering a follow-by-email option:  yous don't accept to develop the feed yourself, or purpose a HTML-gadget to furnish a subscribe-by-email form.

And because it uses Feedburner, yous accept total access to Feedburner's statistics, too a issue of other things that are included inwards Feedburner's features, including:

Disadvantages of the Follow-by-email gadget

There are closed to disadvantages of both the gadget, too the approach that Blogger has used to implement it:
  • Google / Blogger accept mixed upward the words "subscribers" too "followers".  It used to survive that subscribers used RSS gadgets (from Feedburner or other feed-providers), too followers used Blogger's ain following-tools.   But this novel gadget is called "follow-by-email", too it's possible that mixing upward the ideas volition brand closed to people really confused.
  • Using the gadget, yous accept very piffling command over the expect too feel of the  follow-by-email selection on your blog.  

    Compare this to the "Get updates past times email" selection which is inwards the transcend of the sidebar on this blog:  I've position a lot of endeavour into getting the wording "just right" thus potential subscribers know that they volition survive getting a please-confirm email.   This on-screen wording agency that fifty-fifty if they don't deed on the e-mail immediately, they teach closed to other reminder almost if they come upward dorsum to the spider web log over again inwards the future.
  • You accept no command over the message that potential follow-by-emailers are shown to country them to verify their subscription.  It looks similar this

    While this message is fine for the tech-minded people who are probable subscribe to an RSS feed, it volition in all likelihood select a glazed look to those of your visitors who involve a really uncomplicated subscribe-by-email option!  
  • People who subscribe to your spider web log past times e-mail don't run across whatever of the widgets on your blog, or whatever advertisements.   (Unlike regular RSS-feed subscribers for whom yous tin develop AdSense for feeds).  Despite the options mentioned above, ou accept really piffling command over how they run across your messages, peculiarly if they hand to survive using e-mail software that shows your messages inwards apparently text.


Related Articles

Customizing the "click the link to subscribe" message
 
Getting a listing of all your e-mail subscribers

Why RSS / Subscribe to Posts is of import for your blog

The Follow-by-Email gadget:  a really uncomplicated way to give your readers access to blog-updates past times email

Info How To Alter Addthis Follow Push Settings For A Gadget On Weblog Or Website

This article shows how to alter the accounts presented inwards an AddThis Follow gadget which has already been educate on a Wordpress-based website.

(Note:   this is alone relevant for Wordpress.org users.   Wordpress.com users produce non cause got the same liberty to add together or configure plug-ins.)


The AddThis plug-ins for Wordpress render several functions.  One is a Follow gadget, which lets you lot offering links to your describe of piece of occupation concern human relationship on other platforms (eg on Twitter, Facebook together with Instragram), therefore that people who are interested tin subscribe to you lot there, together with teach updates from you lot fifty-fifty if they don't catch your weblog or website regularly). 

When you lot install together with activate this plugin, at that spot is a hide where you lot tin select which other platforms to show, together with tell what your address on those platforms is.   

After you lot cause got educate the plug-in, therefore you lot an add together the AddThis Follow widget to your site,   This gadget displays an icon for each tool which you lot selected, together with each 1 link to the describe of piece of occupation concern human relationship that you lot provided.    How just it looks depends on the options you lot choose, but 1 possibility (Horizontal Follow) is similar this:


But - how produce you lot alter these settings afterwards the gadget has been added? 


For most widgets, to alter their settings you lot just:
  • Choose Appearance > Widgets from the left manus menu
  • Find the widget inwards the listing of ones that cause got been installed
  • Click the down-arrow beside the name, to let on the options.

And initially, AddThis-Follow looks much the same.  Rather than giving the detailed options immediately, it says

To edit the options for your AddThis tools, delight become to the plugin's settings

Which sounds fair plenty - at that spot were a lot of values displayed on the page where you lot selected which social media platforms to include together with how to connected them to your blog.


So you lot click the link, together with teach taken to a page - example below- which looks null similar the 1 where you lot chose the services to display inwards the widget.   Even when you lot scroll down, null looks familiar, or fifty-fifty gives whatever clues nearly how to update the linked social networking accounts:


How to alter the accounts offered past times the AddThis Follow widget afterwards it has been added


Don't outset alongside the Appearance > Widgets  card item.

Instead:
  • Choose alongside Plugins >  Installed plugins  
  • Find   Follow Buttons past times AddThis inwards the list.
  • Click Settings
  • In the listing of gadgets that is displayed, beside the type of Follow push you lot used (horitzontal or vertical), click the Settings button.    [Yes, that is 2 Settings clicks inwards a row.]

This opens upward the familiar hide where you lot tin select social media services past times clicking on their icon, together with entering your refer on that service inwards the champaign at the bottom of the page.


Job Done!    

You tin at nowadays edit the social media accounts linked to your blog  - both correcting errors inwards the master copy setup, or adding novel accounts which cause got been added since then.


What this means

Aach AddThis widget (eg AddThis-Follow, AddThis-Inline, etc) has the same settings each fourth dimension it is used on your site.   So, provided your theme supports having gadgets inwards multiple places, you lot tin cause got the Follow-Me gadget several places  (eg inwards your sidebar together with underneath your posts) - ever looking the same together with linking tothe same social-media accounts.


Related Articles:

There are no related articles for this topic.
Powered by Blogger.